sugar fix: winter blues apple crisp

11 Nov

Warm summer days seem so long ago: I miss the days of summer dresses, skirts and sandals. Although autumn is beautiful to look at, the shivering and frantic rubbing of hands isn’t exactly my idea of having a good ol’ time. For those days where I come home frozen through because I refuse to give up my favourite jacket that just isn’t warm enough anymore, I turn to this recipe to warm me up. This is my favourite recipe for delicious and simple apple crisp, and it is so versatile, too! You can use pears and bananas, or strawberry and rhubarb, or a medley of berries instead of the apples. You can add nutmeg, pecans or almonds to the topping, and interchange the chocolate chips with toffee or marshmallows.

This apple crisp is sure to make you happy! The apples provide that extra boost of vitamin C that you need during the dreary winter days. Vitamin C deficiency has been linked to stress and irritability. And if you feel like your mood swings are getting out of hand, then the oatmeal will lend you a helping hand. Mood swings are often because your blood sugar levels dip, since the oatmeal is high in soluble fiber, it’ll even out your blood sugar levels – and it’ll be smooth sailing from there. The chocolate not only tastes great, but chocolate has also been proven to contain a host of chemicals that send signals to your brain cell receptors to create a happy high. And of course, the smell of cinnamon has been proven to be so comforting to people that it’ll relax you instantly the moment the apple crisp starts baking in the oven.

I also baked my favourite vanilla cupcakes with cream cheese icing for a food segment I shot for school. Here’s the link to the how-to baking segment we shot! Check it out and let me know what you think =)

Enough of my rambling. Here’s what you came for!

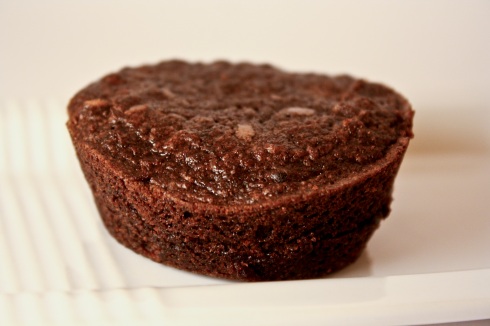
IMG_7564

vanilla cupcakes with cream cheese frosting
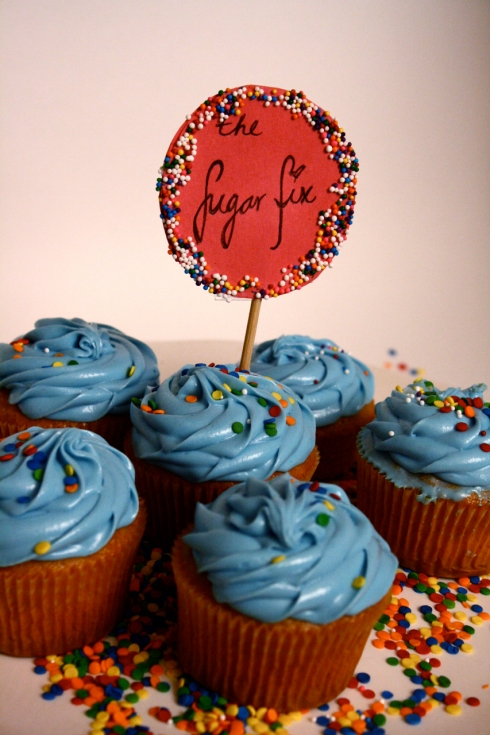
IMG_7568

these are the cast members for The Sugar Fix - a short food segment I filmed for school
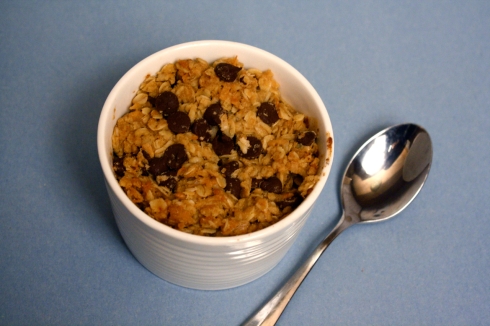
IMG_7578

cinnamon apple crisp with chocolate chip oatmeal crumble topping
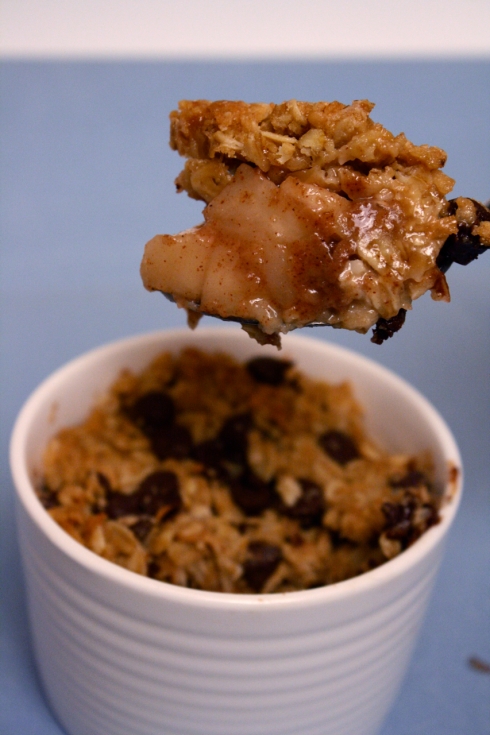
IMG_7580

the apples are nice and soft, and just soak in the brown sugar and cinnamon

Recipe

Ingredients:

  • 2 apples (or one per person)
  • 1/4 cup brown sugar for apple mix
  • 2 tbsp flour
  • 1 cup old fashioned oats
  • 1/2 cup flour
  • 1/2 cup brown sugar for topping
  • 1 tsp cinnamon
  • 1/2 cup walnuts
  • 1/2 cup shredded coconut
  • 1/2 cup cold butter, cut into cubes
  • 1/4 cup chocolate chips

How-to:

  1. Preheat oven to 350F.
  2. Peel and cube the apples and put into a bowl. Add to the mixture the brown sugar and cinnamon, as well as the 2 tbsp of flour. The flour will bind the juices of the apples once they start baking, and will create a nice syrup.
  3. Transfer mixture into baking pan or ramekins.
  4. Now, combine the oat, flour, brown sugar, cinnamon, walnuts and shredded coconut. Incorporate the butter into the mix. It’s best to use your hands to create a crumbly mixture.
  5. Top the apples with the crumble mix. Sprinkle generously with the chocolate chips.
  6. Bake for 35 to 40 minutes, until the topping is golden brown and the apples are tender to the touch.
  7. Remove and let cool for 5 to 10 minutes.
  8. Top off with your favourite ice cream, sit back, and relax.

xo dessertchick
coconut ohmygosh bars

28 Oct

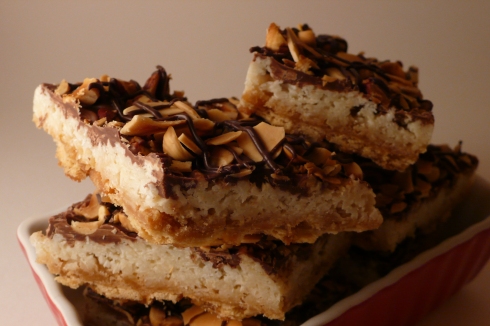
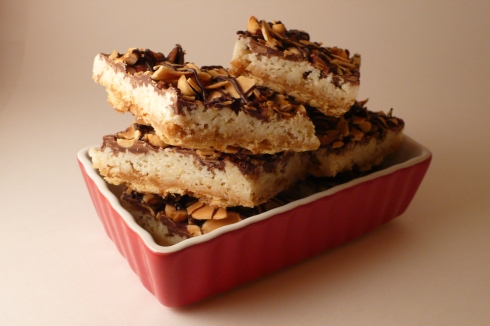
This isn’t really a “new” recipe. In fact, it’s not much of a recipe rather than a last-minute bake-off to use my shredded coconut before it expires – because letting anything expire in your pantry is just so sad. But my oh my, this accidental treat is yummy yummy yummy in my tummy (and a problem for my hips!). These bars are SO sweet and decadent, yet there is something about the combination of caramel and coconut and hazelnuts that is just to die for. The caramel brittle at the bottom just has the right combination of salty crunch and sweet caramel, and the coconut layer is chewy and delicious, and of course you then come aross the bittersweet chocolate layer on top with the added crunch of the toasted nuts. Just thinking about it makes me want to cry because I have no more bars left. You can seriously substitute everything in this recipe and just use my recipe as a guideline, and create your own ohmygosh bars with whatever you have lying around in your pantry. Seriously, all you need is a yummy caramel base, and top it with whatever your heart desires. I simply used my pecan praline caramel cracker recipe and then modified it slightly. Trust me, make double the recipe, keep half for yourself and give the other half away. That way, you’ll seem like the most amazing and generous friend in the world – while eating your own stash secretly in the privacy of your own home. You can have your ohmygosh bars and eat them too 😉 Seriously, I have found a new religion in these bars.

stacks and stacks of "ohmygosh, these are amazing" bars

stacks and stacks of "ohmygosh, these are amazing" bars

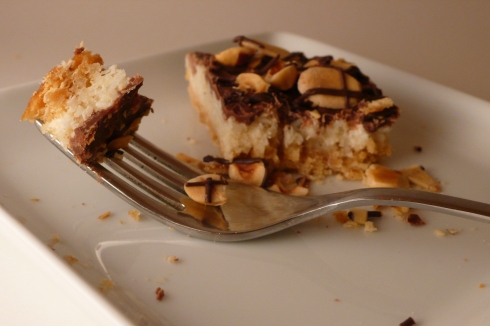
look at all that gooey chewy coconut filling on top of that crunchy caramel brittle, smothered in chocolate!

look at all that gooey chewy coconut filling on top of that crunchy caramel brittle, smothered in chocolate!

who am I kidding - no one eats these with a fork

who am I kidding - no one eats these with a fork

Recipe

Ingredients:

  • 40 salted soda crackers
  • 1 cup butter
  • 1 cup brown sugar
  • 1/2 tsp of salt
  • 1/2 tsp pure vanilla extract
  • 3 cups shredded unsweetened coconut
  • 1/2 cup (1/2 can) condensed milk
  • 1 1/2 cup bittersweet chocolate chips
  • 1/2 cup toasted hazelnuts

How-to:

  1. Preheat the oven to 350°F. Line an 11-by-17-inch baking sheet completely with foil, and then line the base of the foil with parchment paper, cut to fit.
  2. Line the bottom of the baking sheet with crackers, covering all parts.
  3. In a medium heavy-duty saucepan, melt the butter and brown sugar together, and stir it over medium heat until it begins to boil. Once it has begun boiling, let it bubble for three more minutes, stirring it well. It will thicken a bit as it cooks. Remove from the heat and add the salt and vanilla, and then quickly pour it over the matzo or crackers. You’ll want to spread it quickly, as it will begin to set as soon as it is poured.
  4. In a small bowl, mix together the coconut and the condensed milk. You can use more of the condensed milk if you find the coconut mix to be too dry, but I found that 1/2 cup was just enough to bind the coconut together and provide the right amount of sweetness.
  5. Spread the coconut mixture evenly over your caramel-covered crackers.
  6. Bake for 15 minutes, making sure that the corners of the caramel or the coconut layer doesn’t get too dark. You want it to be golden.
  7. Remove from the oven, and sprinkle your chocolate chips evenly over the coconut. Return to the oven just for 2 minutes, to soften the chocolate.
  8. Using an off-set spatula, spread the chocolate into an even layer. Sprinkle the toasted hazelnuts over top, and feel free to drizzle even more chocolate on top. Since I also had sliced almonds on hand, I sprinkled those on top too. The more, the merrier =)
  9. Enjoy!

xo dessertchick

hazelnut buttercrunch toffee brittle

26 Oct

I have finally settled back into my kitchen after being away from it for over two months. Since I’ve landed back onto Canadian soil, I have made the following: marble cake, key lime pie, lemon cheesecake tart, mini pecan pie, mini carrot cakes, hazelnut shortbread, buttercrunch toffee brittle and coconut bars. Sadly, I wasn’t able to take photos of any of these delightful goodies until I made the buttercrunch toffee because the charger of my beloved SLR is currently on its way in a FedEx package from Vietnam. Yes, the idiot that I am, I forgot the chargers for both my SLR and my point&shoot in Vietnam – although it is because of very mean and bitter and unfair customs officials in Vietnam who were very very very corrupt. But that’s a story for another day.

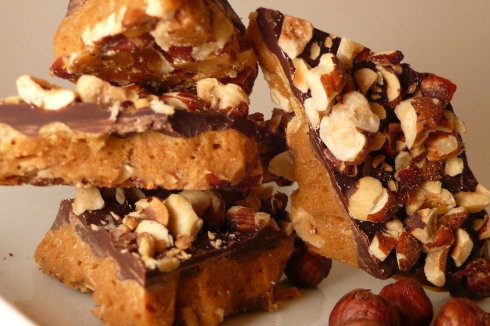
Let me now introduce you to this super easy yet oh-so-delicious, you-can’t-eat-just-one-or-four-or-five buttercrunch toffee brittle.  I found this recipe on Joy of Baking while I was supposed to be “interning” and being a good reporter, so shhhh, don’t tell anyone, okay? I found hazelnuts on sale the day after Thanksgiving, so I decided to slightly change the recipe by substituting the almonds with the hazelnuts. The layer of toasted hazelnuts at the bottom, followed by the buttercrunch toffee, and the chocolate and hazelnut sprinkles on top…it tastes fantastic! Also, I think this makes a really good gift idea – especially since Christmas is slowly creeping up on us now. Brittle is sold in stores in very pretty cellophane and fancy ribbons for a ridiculous price, and you can make your own (many!!!!) variations at the fraction of the price. Plus, you can then awe your friends with how amazing and talented you are at making these very pretty and yummy goodies.

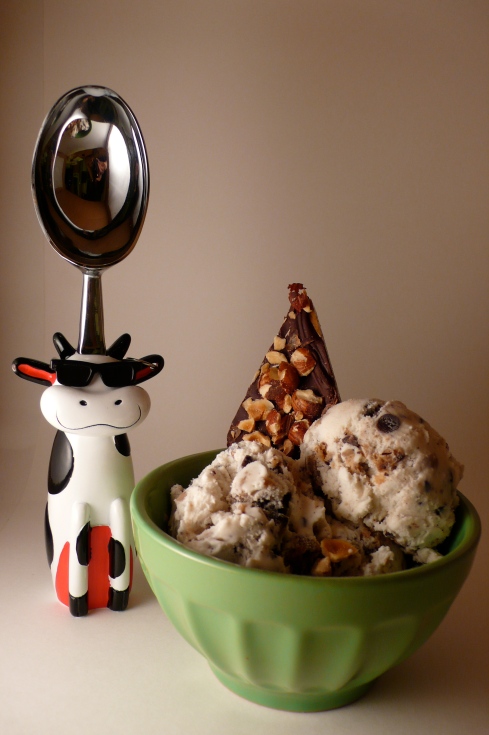
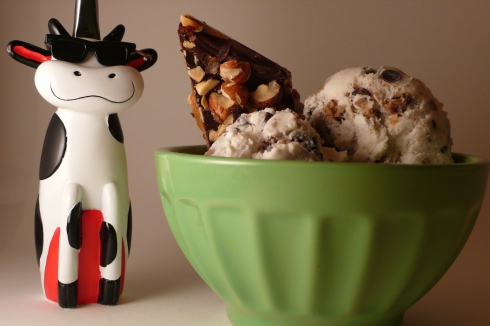
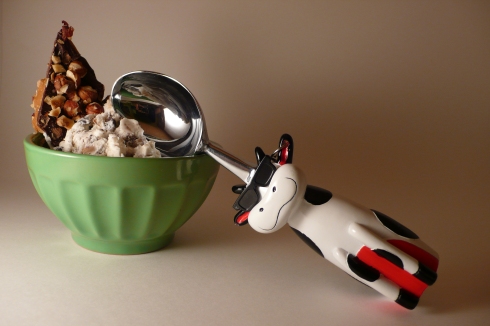
The brittle is pretty sinful on its own with a nice cold cup of milk, or a hot cup of coffee, but if you’re feeling like living life on the edge, eat the brittle with a homemade sundae or just a couple of scoops of your favourite ice cream. I’ve been eating ice cream like crazy as of late – mostly due to the fact of finding the CUTEST ice cream scoop on the face of the world. So really, the cow tells me to eat ice cream – and I’m not crazy, I promise! Anyhow, enough of my ramblings. Here is what you’re really waiting =)

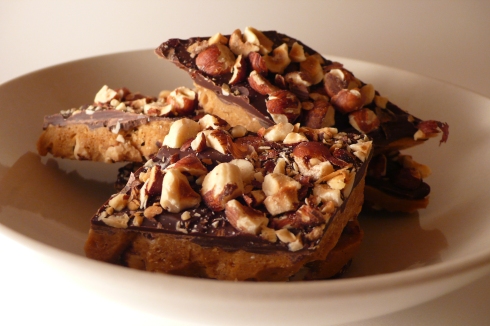
a plate full of deliciousness

a plate full of deliciousness

crunchy brittle paired with ice cream - scooped with the coolest ice cream scoop ever

crunchy brittle paired with ice cream - scooped with the coolest ice cream scoop ever

crunchy layer of hazelnuts topped with buttercrunch toffee layer, smothered in milk chocolate and sprinkled with toasted hazelnuts

crunchy layer of hazelnuts topped with buttercrunch toffee layer, smothered in milk chocolate and sprinkled with toasted hazelnuts

notice the earring that the Cool Cow Scoop is wearing?

notice the earring that the Cool Cow Scoop is wearing?

okay, at this point, I was just having too much fun =)

okay, at this point, I was just having too much fun =)


Recipe

Tips (from Joy of Baking):

  • do not make the brittle on a humid day
  • use a wooden spoon to stir, since it is easier to clean than a metal spoon
  • have all your ingredients ready to go, especially the baking soda and vanilla
  • the vanilla adds flavour, while the baking soda aids in browning and allows for a lighter texture
  • store in an airtight container to prevent the brittle from softening
  • this recipe makes one pound of brittle (which is barely enough for you to enjoy AND to share with others =P)

Ingredients:

  • 2 cups slivered almonds or chopped hazelnuts (or both!)
  • 1 1/4 cup light brown sugar
  • 2 tbsp water
  • 1/2 cup unsalted butter
  • 1 tsp vanilla extract
  • 1/4 tsp baking soda
  • 6 oz semi-sweet or bittersweet chocolate

How-to:

  1. Preheat oven to 350F. Place almonds/hazelnuts on a baking sheet and toast in the oven for 8-10 minutes. Set aside to cool.
  2. Once the nuts are cooled, you should now chop them. The recipe calls for a food processor, but I found that it pulverized them too fine. I found it was easier and tastier when you just gave them a rough chop with a knife.
  3. Sprinkle half of the nuts into a 8×10 inch buttered baking sheet. Set aside.
  4. In a heavy saucepan, combine the butter, brown sugar and water
  5. Have the baking soda and vanilla ready to go at this point.
  6. Bring the sugar mixture to a boil, avoiding over-stirring, until the mixture reaches 285F on a candy thermometer (soft-crack stage).
  7. Immediately remove the pan from heat, and add the baking soda and vanilla all at once.
  8. Immediately pour the mixture evenly onto your baking sheet over the almonds/hazelnuts.
  9. Sprinkle the chocolate over top. The hot caramel mixture will soften and melt the chocolate. Using an off-set spatula, spread the chocolate evenly over the caramel mixture.
  10. Sprinkle with the remaining nuts and refrigerate until completely cooled.
  11. Once cooled, you can break or cut the brittle into your desired sizes and shapes.
  12. Mangia ❤

xo dessertchick

nutella delight profiteroles

21 Sep

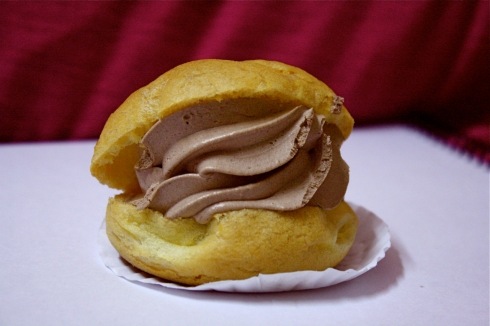
These profiteroles were my very first venture into making choux pastry – and it was frighteningly easy. If I had known this before, I would have attempted these much sooner. Now, I’ll be planning on making eclairs! These profiteroles are filled with fluffy, creamy nutella chocolate mousse, and are sinful to eat – especially during a hot day accompanied with some fresh fruit or, if you’re feeling dangerous, with ice cream.

one bite of this, and you'll forget all your worries.

one bite of this, and you'll forget all your worries.

Recipe

Ingredients:

  • 1 brick of cream cheese (250g), softened at room temperature
  • 1 cup whipping cream (liquid, not whipped yet)
  • 3 tbsp honey
  • 1/2 cup sugar
  • 1/2 cup Nutella, melted in the microwave
  • 1/4 cup semi-sweet chocolate, melted in the microwave
  • 1/2 cup water
  • 1/2 milk
  • 4 ounces (125g) unsalted butter, room temperature, cut into small cubes
  • 1/2 cup flour
  • 1/4 tsp salt
  • 4 large eggs
  • 1 extra egg for eggwash

How-to:

  1. In a bowl or stand mixer, whisk whipping cream and 1/4 cup of the sugar until it forms into nice dense whipped cream, about 3 to 4 minutes.
  2. In a separate bowl, whisk the cream cheese and the remaining 1/4 cup sugar until creamy. Continue to whisk and add the honey.
  3. Add the melted Nutella and the melted chocolate into the cream cheese mix, and continue beating until well incorporated.
  4. Now, fold the whipped cream mixture into the Nutella mixture with a spatula.
  5. Cover up the bowl and refrigerate for an hour.
  6. In the meantime, you can tackle the choux pastry. Preheat the oven to 400F.
  7. Bring the water, milk, butter and salt to a slow boil in a pan, making sure to stir constantly so that the butter dissolves before the mix comes to a boil.
  8. The moment bubbles start forming, remove form heat and add all the flour at once, stirring quickly to make a very smooth paste.
  9. Place the pan back on the stove and, over low heat, stir the mix constantly until the dough forms into a ball and pulls away from the pan. This should only take about a minute.
  10. Transfer the ball into a bowl and let cool for at least 5 minutes. You’ll be adding the eggs, one at a time, and don’t want them to cook.
  11. Crack one egg at a time, incorporating each of them well into the ball of dough before adding the next.
  12. The final paste should easily be dropped onto the baking sheet, if it is too runny, add a little bit of flour until you get it right.
  13. Line your baking sheet with parchment paper or you silpad.
  14. Form the choux pastry by either piping mounds with a piping bag, or simply drop it onto the sheet using two spoons.
  15. Leave an inch between each mound because these babies expand.
  16. Make the egg wash by beating the egg with a pinch of salt. Brush egg wash on the choux pastry, making sure not to drip onto the tray or else it’ll burn.
  17. Bake the choux pastry in the oven at 400F for 6 to 7 minutes. Then reduce the temperature to 325F and bake for another 3 to 4 minutes, until golden brown.
  18. Remove baked profiteroles from the tray and let cool.
  19. Once cooled, cut each profiterole in half using a sharp knife – but don’t cut all the way through.
  20. Spoon the Nutella mousse into a piping bag, and pipe into the opening of each pastry, not filling it too much because you still want the top to be able to close somewhat.
  21. Continue with all of your profiteroles, and eat the remaining Nutella mousse =)

xo dessertchick

princess cupcakes

17 Sep

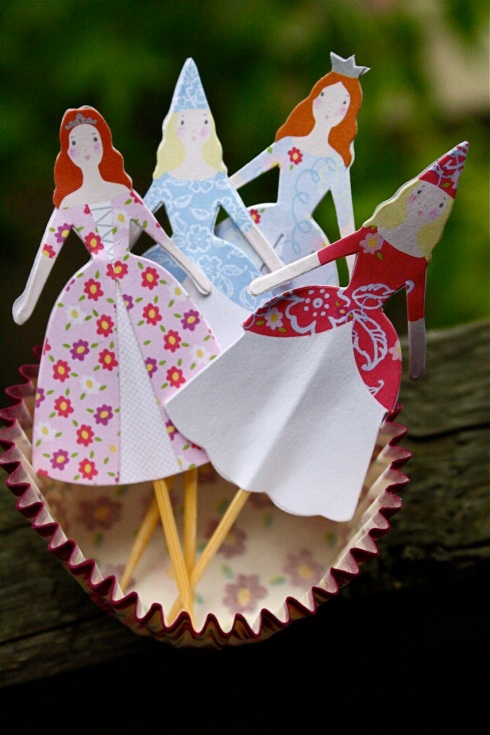
For my birthday a couple of months back, my friend & ex co-worker Jen gave me this cupcake kit that was the most adorable thing I have ever seen. I squealed, giggled and hugged the package to my bosom, and was ecstatic for the rest of the day. You see, the cupcake kit came with two dainty and flowery designs for cupcake liners, and the most delicate and beautiful princess cupcake toppers I have ever seen. Thank you once again, Jen!

Too. Much. Cuteness. I. Cannot. Handle. It.

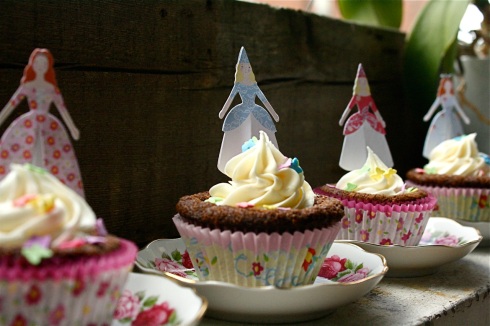
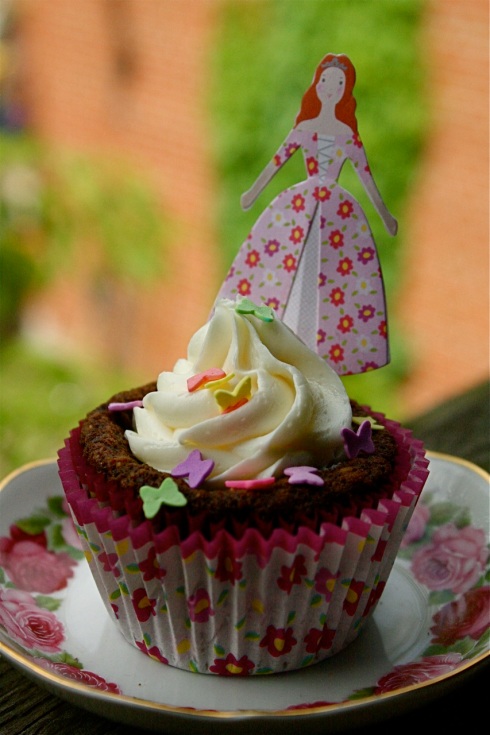
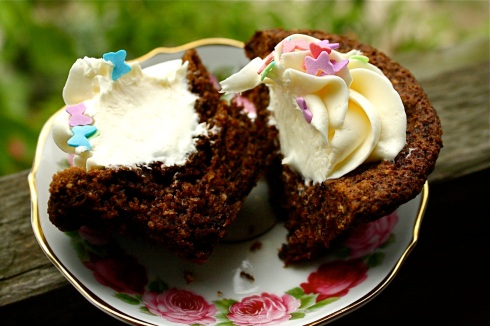
There are four princess in total, two redheads and two blondes, and they each have a different dress and are just to die for. As you can see, just writing about them makes me giddy. It took me a while to think of a cupcake that would be worthy of these princesses: without further ado, let me introduce to you the royal chocolate hazelnut cupcakes I baked and topped off with cream cheese frosting and butterfly sprinkles. The cupcakes were moist and nutty and chocolatey and everything I could have hoped for – but I think I enjoyed them just that much more because the toppers are so gosh-darn adorable.

IMG_5384

royal tea parties call for the dainty china teacups

IMG_5363_2

this princess has a dress that matches the teacup and the cupcake liner

IMG_5428

applause for the royal cast! how adorable are these?!

IMG_5420

but the main attraction is the delicious & decadent chocolate hazelnut cupcake with cream cheese icing

Recipe

Ingredients:

  • 2 cups pastry flour
  • 1 cup unsweetened cocoa powder
  • 1 cup ground hazelnuts
  • 2 tsp baking soda
  • 1 tsp baking powder
  • 3/4 tsp salt
  • 3 large eggs
  • 1 1/2 cups sugar
  • 3/4 cup butter. softened
  • 2 1/2 cups buttermilk
  • 2 tsp vanilla extract
  • 1/2 cup butter, softened
  • 8 ounces (1 cup) cream cheese, softened
  • 2 1/2 cups confectioners’ sugar
  • 1 teaspoon vanilla extract

How-to:

  1. Preheat oven to 350F. Grease your cupcake tins.
  2. Sift together flour, cocoa powder, ground hazelnuts, baking soda, baking powder and salt. Set aside.
  3. In a large bowl, beat the eggs and sugar for 5 minutes. The mix should be pale and thick.
  4. Add in the butter. Mix until combined.
  5. Now, add in the buttermilk and vanilla. Beat until well incorporated.
  6. Add the flour mixture in 3 increments, making sure that everything is smooth. Lumpy is not good!
  7. Now, spoon evenly into the cupcake tins. These rise a bit, and then fall in the centre, so you don’t have to be too worried about spilling over.
  8. Bake in the oven for 25 minutes.
  9. Remove from the oven and let cool. If some of them haven’t dropped in the centre during baking, they will now while they are cooling off. No worries, that’ll give you plenty of room to pipe in some delicious cream cheese frosting!
  10. In a medium bowl, combine butter, cream cheese, confectioners’ sugar and 1 teaspoon vanilla. Beat until the mixture is smooth and creamy.  Frost the cooled cupcakes however you see fit.

xo dessertchick
bridal mania pt 3 – cute as can be desserts

15 Sep

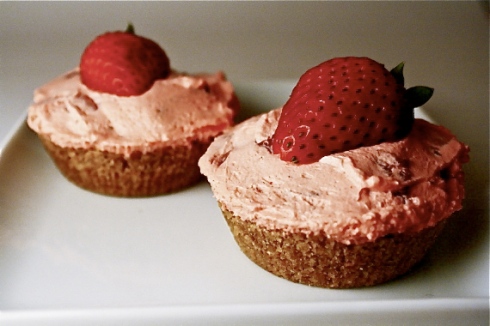
This is the last in the trilogy of bridal mania posts. I just wanted to show you guys the cute mini versions of my strawberry Oreo pies that I made. They were so much fun to make, and probably the easiest dessert for this bridal shower. I simply doubled the recipe, bought a bunch of disposable mini tart shells and pressed the graham cracker crust into them. Then just scoop the filling into each tart shell and top off with half a strawberry.

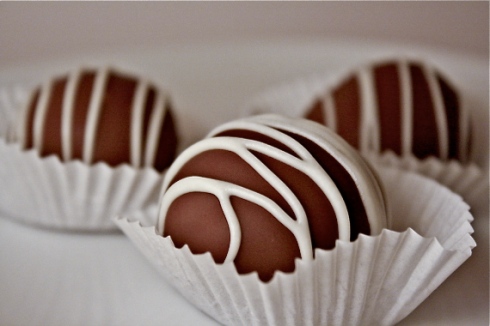
The Oreo truffles I usually make are smaller but Shirley asked me to make them a bit bigger for the bridal shower. So, I obliged and it made the dipping a bit more difficult – not to mention the fact that the hot kitchen made it impossible for the chocolate to set. I ended up making these in shifts and putting them into the fridge until they set. It took a bit longer than usual, but they are soo worth it.

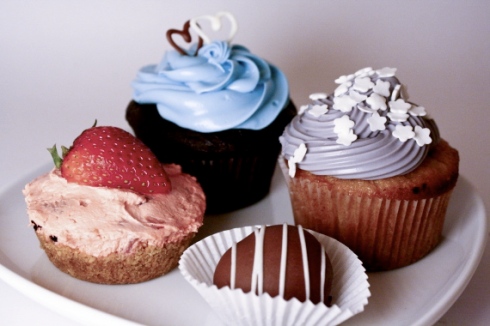
In the end, it was a lot of fun to have an excuse to bake these many goodies. I think the selection was pretty good: refreshing strawberry oreo pies, decadent oreo truffles, rich buttermilk chocolate cupcakes and moist buttermilk vanilla cupcakes. Delicious.

a taste of summer: mini oreo strawberry pies

a taste of summer: mini oreo strawberry pies

a taste of decadence: giant hand-dipped oreo truffles

a taste of decadence: giant hand-dipped oreo truffles

a taste of everything: the bridal shower desserts

a taste of everything: the bridal shower desserts

xo dessertchick
bridal mania pt 2- vanilla bean overload cupcakes

15 Sep

This is the second cupcake that I made for the bridal shower. The bride and the bridesmaid wanted something simple and classic, and of course, delicious. So, since the buttermilk chocolate cupcakes took care of decadence, it was a no brainer to pair it with light and fluffy buttermilk vanilla bean cupcakes. And what pairs well with vanilla cupcakes? Of course, even more of the creamy and delicious vanilla bean buttercream icing. Really, when you’ve got a good thing….why stop? I say, just slather on more of the good stuff.

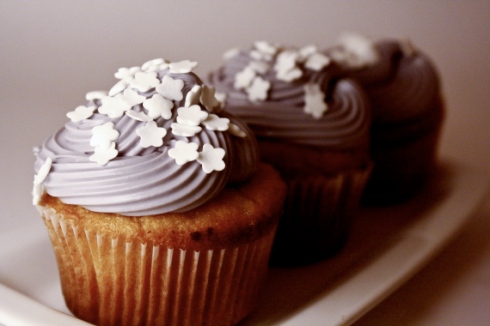
The picture I have are of the cupcakes I made with the leftover cupcakes because I didn’t have time to set up a photoshoot with the bridal cupcakes. For the bridal shower, the icing was a nice strong pink rather than the lavender icing I have shown here. It’s a good thing I had a couple left over because the eight I had saved for pictures were devoured withing 12 hours.  The recipe is fool proof and has become my favourite go-to recipe for vanilla cupcakes. Just make sure not to overbake these babies.

fluffy and moist and you can't just eat one

fluffy and moist and you can't just eat one

Recipe

Ingredients: (this makes 24 cupcakes)

  • 3 cup pastry flour
  • 1 tbsp baking powder
  • 1/2 tsp salt
  • 1 cup butter, softened
  • 3 tsp vanilla bean paste/vanilla bean extract/vanilla bean seeds
  • 1 3/4 cups super fine sugar
  • 4 large eggs
  • 1 1/4 cups buttermilk

How-to:

  1. Preheat oven to 350F. Grease and line two muffin pans.
  2. In a medium bowl, sift together flour, baking powder and salt.
  3. In a large bowl, beat together butter, sugar and vanilla bean paste for 4 minutes, until light and fluffy.
  4. Beat in the eggs one at a time until thoroughly combined.
  5. Add 1/3 of the flour mix, then 1/2 of the buttermilk, then 1/3 of the flour mix, then the rest of the buttermilk, and finally the remaining 1/3 of the flour mix, making sure only to mix for a few seconds after each addition (you don’t want to overmix). Make sure to scrape down the side of the bowl as well.
  6. Scoop the batter evenly into the muffin pans, making sure not to overfill it because they will rise a lot.
  7. Bake for 20 to 22 minutes. I had to rotate the pan halfway through to ensure even baking.
  8. Let the cupcakes cool in the pan for 5 minutes before removing them and letting them cool completely on a wire rack.
  9. Only when they are completely cooled (and this is important!), proceed to top them off with the vanilla buttercream icing.
  10. Sprinkle pretty sprinkles and admire your work – right before biting in.

xo dessertchick
bridal mania pt 1 – buttermilk chocolate vanilla buttercream cupcakes

12 Sep

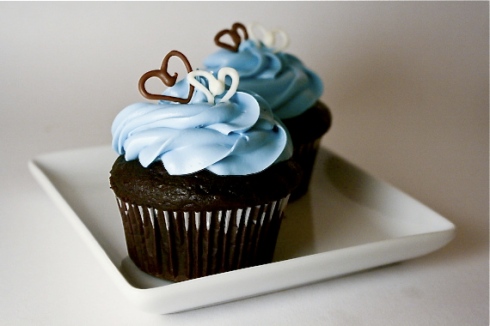
My friend Shirley asked me to make truffles and such for her cousin’s wedding for the wedding favours. However, I was going to be in Vietnam at the time of the wedding. Instead, I ended up baking for the bridal shower! I made 30 chocolate cupcakes and 30 vanilla cupcakes topped with vanilla buttercream icing. Simple and classy. And of course she wanted 40 mini strawberry oreo tarts as well as 75 oreo truffles. It was the first time I’ve baked such large quantities, and I would say that it was smooth sailing – except it wasn’t. I forgot how difficult it is to bake in the summer while your kitchen is swelteringly hot. Ridiculous. Anyhow, it was a race against time to keep everything from melting. For these buttermilk chocolate cupcakes, I found a really amazing recipe and only had to slightly modify it. The vanilla buttercream icing was easy to whip up, but not to easy to keep from drooping off my cupcakes after piping. And let’s not talk about the chocolate hearts – it took forever for them to set, and when I popped them on the icing, they started melting just from the heat of my fingers. Anyhow, all the sweat (and tears) paid off. Shirley, and her cousin, were happy. This is part one of what I baked for the bridal shower. Part two will come shortly!

so pretty and so simple. and of course, delicious.

Recipe

Ingredients:

  • 1/2 cup semi-sweet chocolate
  • 2 1/2 cups pastry flour
  • 1 1/2 cup unsweetened cocoa powder
  • 2 tsp baking soda
  • 1 tsp baking powder
  • 3/4 tsp salt
  • 3 large eggs
  • 1 1/2 cups sugar
  • 3/4 cup butter. softened
  • 2 1/2 cups buttermilk
  • 2 tsp vanilla extract
  • 2 cups unsalted butter
  • 3 1/2 cups powdered sugar
  • 1/2 tsp salt
  • 3 tsp vanilla bean paste
  • 1/4 cup milk

How-to:

  1. Preheat oven to 350F. Grease your muffin tins.
  2. Melt the chocolate in the microwave, in 15 second intervals, making sure to stir in between. Set aside to cool down for a bit.
  3. Sift together flour, cocoa powder, baking soda, baking powder and salt. Set aside.
  4. In a large bowl, beat the eggs and sugar for 5 minutes, until it is pale and thick.
  5. Add in the butter. Mix until combined.
  6. Add in the melted chocolate.
  7. Now, add in the buttermilk and vanilla. Beat until well incorporated.
  8. Add the flour mixture in 3 increments and beat until smooth.
  9. Divide batter into the cupcake tins. This batter made 20 cupcakes for me.
  10. Bake for 25 minutes or until a toothpick comes out clean. Remove from oven and let cool.
  11. In the meantime, with your electric beater, whip the butter until it is creamy. Slowly add the powdered sugar, making sure to scrape down the sides until fully combined.
  12. Add the vanilla bean paste. Slowly, add the milk and continue beating on medium speed until fully combined, for approx. 5 minutes.
  13. Put icing into piping bag and decorate to your heart’s delight.
  14. As for the chocolate hearts, I just took chocolate wafers, melted them, put the chocolate into a ziploc bag. Snip a small corner off and start drawing hearts onto wax paper. Let cool and set, peel them off and top the cupcakes off!

xo dessertchick
nutella pinwheelies

11 Sep
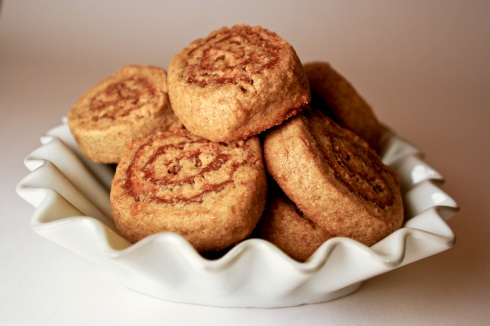
Life is too short to be square. That’s why all the good things in life are round – like cookies! How many square cookies really come to mind? I mean, okay, yes, there are square cookies but the best kinds (chocolate chip, oatmeal raisin cookies, ginger molasses cookies, snickerdoodles, macaroons, macarons, etc etc) are all round, or at the very least spherical. Anyhow, let’s not get philosophical right now, but the bottom line is that these nutella pinwheelies are one of the most delicious and perfect things that could come in a round package. They are super easy to make – and a recipe that gives you the chance to lick a nutella covered spoon is the best kind of recipe. Enjoy the simple things in life – enjoy these nutella pinwheelies.
happiness in bite-sized format

happiness in bite-sized format

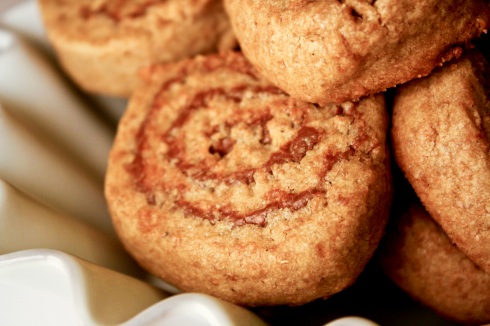
nutella pinwheels are the best kind of pinwheels.

nutella pinwheels are the best kind of pinwheels.

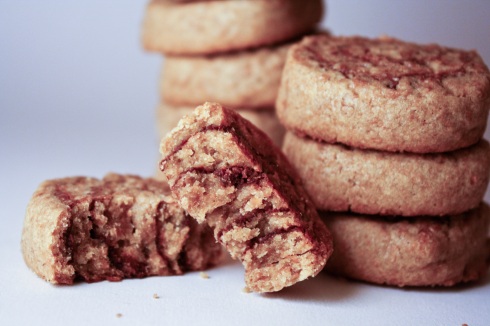
good things come in small packages

good things come in small packages

Recipe

Pssssst, this makes a LOT of cookies. Feel free to halve, although more cookies = more fun    =)

Ingredients:

  • 1 cup granulated sugar
  • 2 tsp vanilla extract
  • 1 1/2 cup softened butter
  • 2 large egg
  • 1 tsp salt
  • 3 cups flour
  • 1 cup nutella or any other chocolate hazelnut spread

How-to:

  1. In a bowl, beat the sugar, vanilla sugar if using, and egg together on medium until incorporated.
  2. Now is the time to add the vanilla extract if that’s what you have on hand.
  3. Cream in the butter, and beat on medium-high until it is nice and smooth.
  4. Slowly, add in the flour and salt, and continue mixing until a soft dough forms.
  5. Scrape off the sides, and using your hands, form the dough into two disks. Wrap in plastic wrap and refrigerate for 10 to 15 minutes.
  6. Take the dough out of the fridge and start rolling one disk out on a well-floured surface.
  7. Try to shape the dough into a rectangle, going no thinner than 1/4 inch.
  8. Cut the large rectangle in half. Using half the nutella, spread it evenly over both rectangles, trying not to go too close to the edge, or else it’ll make a huge mess.
  9. Slowly, starting with the long edges, roll the dough into a firm log. Make sure to seal the edges – you can easily do that with your fingers, since the buttery dough is easily manipulated. Repeat with second rectangle.
  10. Cover the logs and refrigerate for another 20 minutes. This will make sure that, once cut, the cookies will keep their pretty swirls.
  11. Repeat steps 6 through 10 with the second disk of dough.
  12. Preheat your oven to 350F. Prepare your baking sheets by lining them with parchment paper or using a silpat.
  13. Cut the logs into 1/2 inch pieces, and place onto a prepared baking sheet. Bake in the middle of the oven for 12 minutes for a chewy cookie, or 15 minutes for a crispier one.
  14. After your timer goes off, remove from the oven and let the cookies rest for a minute or two before removing them and placing them onto your cooling rack.
  15. Enjoy with a nice cold class of milk.

xo dessertchick
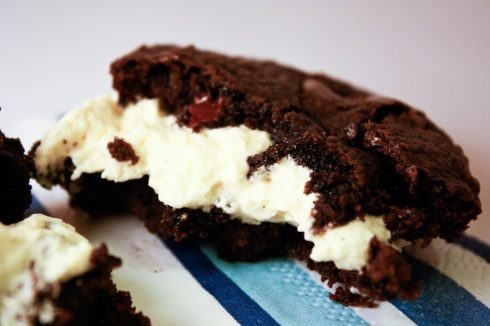
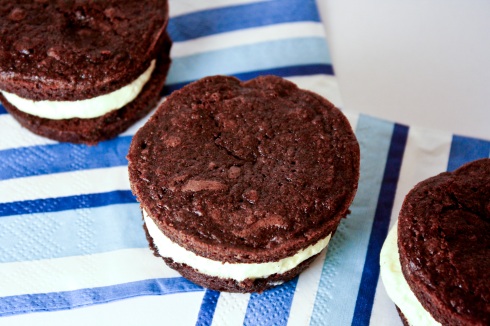
easy peasy brownie whoopie pies

10 Sep

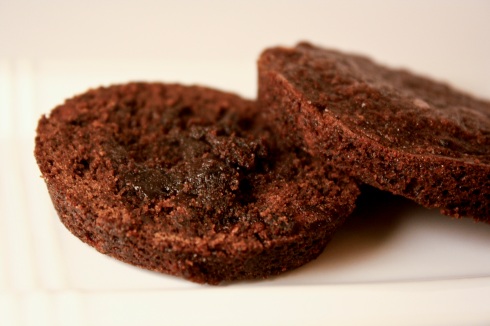
I’ve been storing these photos for a while now, because the summer was just too hectic in order to write up these posts. I’m trying to catch up now, so check back often for”new” updates of all the goodies I baked in the summer. I made the super easy brownie whoopie pies a couple of weeks ago, and they were delicious. I was a bit reluctant to make them because it requires you to buy marshmallow fluff – which is a very dangerous thing for me to have around my kitchen. I nevertheless couldn’t pass up the opportunity to combine marshmallow filling with dense brownies. So, tada! Let me present you my super delicious & super easy brownie whoopie pies. I adapted and slightly changed my brownie recipe from Dorie Greenspan’s recipe, since she is my hero.

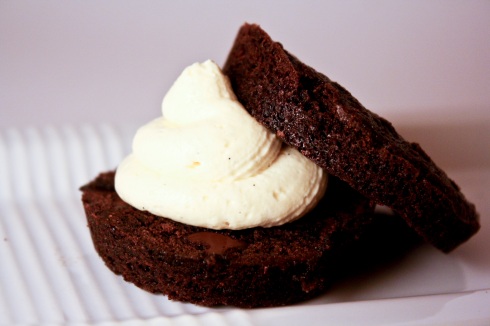
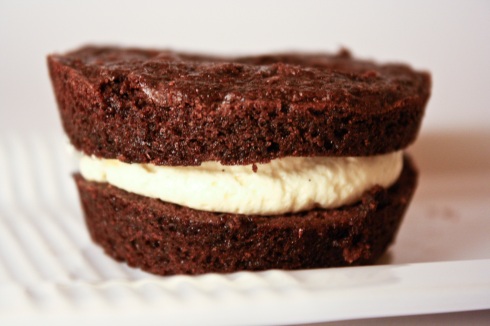
The brownies basically look like those two-bite brownies and taste exactly like them – if not a bit fudgier and denser and…better. Homemade is best, isn’t it? Once they finish baking in your mini muffin pan, it’s simply a matter of letting them cool while you whip up the frosting. The assembly is as easy as 1,2,3. Cut, fill & top it up.

Enjoy!

so innocent looking.

You take a brownie....

...you cut the brownie in half...

...you cut the brownie in half...

...garnish with a generous dollop of cream filling...

...garnish with a generous dollop of cream filling...

....and top it all off with the brownie's other half.

....and top it all off with the brownie's other half.

Repeat process as often as desired....

Repeat process as often as desired....

...and chomp in.

...and chomp in.

Recipe

Ingredients:

  • 1/4 cup pastry flour
  • 1/2 tsp ground cinnamon
  • 1/2 tsp all-spice
  • 1/4 tsp salt
  • 1/2 cup butter
  • 1 cup semi-sweet chocolate, chopped.
  • 2 tsp instant coffee
  • 2 eggs
  • 1 cup sugar
  • 2 tsp vanilla extract
  • 4 oz semi-sweet chocolate, chopped
  • 1 cup butter
  • 2 cups powdered sugar
  • 1 jar (7 oz) marshmallow fluff
  • 2 tsp vanilla extract

How-to:

  1. Preheat your oven to 325 degrees. Prepare your mini or regular sized muffin tins.
  2. In a small bowl, mix together the flour, cinnamon, all-spice and salt.
  3. In a large saucepan, melt the butter slowly over low heat. You don’t want the butter to burn on you.
  4. Once the butter is melted, add 1 cup of the semi-sweet chocolate and stir until fully melted. Add the instant coffee and continue to stir until everything is incorporated.
  5. Remove from heat and let cool down, between 5 and 10 minutes. One at a time, whisk in the eggs into the butter/chocolate mixture.
  6. Stir in the dry ingredients, mixing only until just incorporated. Try not to overmix.
  7. Spoon the mixture into the mini muffin tins. You can fill the, 3/4 of the way up, since these babies don’t rise much.
  8. Bake for 15 minutes and let cool in the pan for at least 15 minutes before removing them to a wire rack – otherwise your brownies will break. In the meantime….
  9. In a medium sized bowl, beat together the butter and confectioners sugar until light and fluffy.
  10. Add the marshmallow fluff and vanilla extract and continue to beat the mixture until it is fully combined.
  11. Spoon mixture into a piping bag.
  12. Cut the cooled brownies in half. Pipe a generous dollop of fluff onto the bottom half and then top with the remaining brownie half.
  13. Share & enjoy!

xo dessertchick